
How to use a Zoom H2n audio recorder
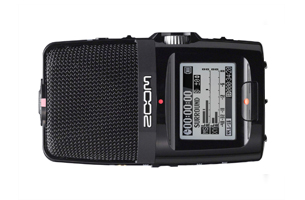
The Zoom H2n is a lightweight and easy to use audio recorder ideal for recording lectures, interviews & meetings.
Quick start
Select microphone configuration on top of recorder:
- XY = Basic stereo recording - point front of recorder toward sound source.
- MS = Mid-side recording ideal for film audio - point rear of recorder toward sound source.
- 2ch [4ch] = Records in surround. Ideal for recording meetings.
Slide battery cover off and insert batteries according to negative/positive symbols.
Slide the “on” button down until the display comes on.
Select recording format : MENU (button)>REC>REC FORMAT>MP3-160kbps (iTunes quality) [MP3 is best in most cases*].
(Select MENU then navigate menu options by rocking the PLAY button up and down. Press the PLAY button to select menu option.)
Press the red “record” button. [You are recording when the timecode numbers on the ZOOM H2n display are counting up.]
To stop recording press the “record” button again.
File management
Use the playback buttons to listen to files. [Best with headphones].
The Zoom H2n records to an SD card. The SD slot is located at the base of the recorder. Alternatively, connect a USB cable between the computer and the ZOOM H2n with the recorder off. When prompted on the screen select "USD CARD READER". In the computer, navigate to the H2N_SD folder>STEREO>FOLDER01 and drag files directly from the disc image to a space on your computer.
To delete files: Navigate to a file: MENU>FILEselectfile>DELETE. You can also rename files here.
To Format (wipe) the entire card: MENU>SD CARD>FORMAT>confirm YES
Information and tips
Audio levels
Adjust MIC GAIN on side of recorder. Connect headphones to check sound quality. Monitor UV meters. Move the recorder to achieve optimal sound.
For automatic recording levels: MENU>INPUT>AUTO GAIN. You can choose from three options - CONCERT, SOLO or MEETING.
Background noise
If there is excessive wind, traffic or similar rumbling noise got to MENU>INPUT>LO CUT.
File formats
- *MP3 = approx. 1mb per minute. Best in most cases. Files are smaller and easier to transfer, store and share.
- WAV = approx. 10mb per minute. Best for archival material. Larger files, but higher quality.
Computer microphone
To use the ZOOM H2n as a computer microphone, connect the USB cable to both the computer and the ZOOM H2n, with the recorder off. When prompted on the screen select "AUDIO I/F" by pressing the PLAY button. Frequency sampling should be 44.1kHz in most cases and 48kHz for video applications. In your computer sound preferences select the ZOOM H2n as the audio input.
For further information, see ZOOM H2n
This recorder is available to staff only.
The content on this page is intended for UNSW staff only
Need help?
If you have further questions, have a look at Self Help or the IT Service Centre website.
Alternatively, you can contact the IT Service Centre on 9385 1333.
CRICOS Provider Code: 00098G
ABN: 57 195 873 179
UNSW Sydney NSW 2052 Australia
Telephone (+61 02) 9385 1333
Authorised by IT & AV Manager, Faculty of Arts and Social Sciences, UNSW Australia
Page last updated: Thursday 19 April 2018