
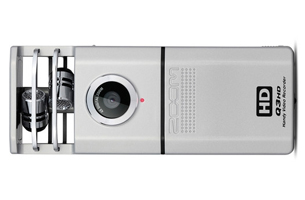
How to use a Zoom Q3HD video camera
The Zoom Q3HD is a compact audio and video recorder ideal for recording lectures, presentations & interviews.
Quick start
-
Slide battery cover off and insert batteries according to negative/positive symbols.
-
Turn on the device by pressing the power button.
-
Press the “MENU” button and using the “ARROW KEYS” and select the “VIDEO” icon and press the “RECORD” button to enter the video menu. Once in the video menu highlight the desired video quality and press the “RECORD” button to confirm.
-
Return to the camera view and when you are ready to record Press the red “RECORD” button. [You are recording when the red timecode numbers on the ZOOM Q3HD display are counting up].
-
To stop recording press the “RECORD” button again.
File management
-
Press the “PLAY” button to view files. [Best with headphones].
-
The Zoom Q3HD records to a 16GB SD card. Connect the USB attached to the device to the computer with the recorder off. When the device displays a USB symbol you are now able to locate the device on your computer. To navigate to your files select the Zoom Q3HD device e.g.
Q3HD_SD>DCIM>100_ZOOM>”file_name”
-
To delete files: There are two ways to do this;
1) Connect the device to your computer and follow the instructions above to locate the “file_name”. Highlight desired file and delete them.
2) Navigate to the camera view and press the “PLAY” button. Scroll through the recorded files and choose the file you would like to delete. Press the “DELETE” button, use the “ARROW” keys to select “YES” or “NO” and press the Record button to confirm. You are also able to delete files viewing the device through your computer.
-
To Format (wipe) the entire card: Press the “MENU” button, navigate to the “SETTING” icon and press the “RECORD” button to enter the menu. In the setting menu highlight “SD FORMAT” option and press the “RECORD” button. Select the “YES” option and press the “RECORD” button to confirm.
Information and tips
Audio levels
-
To monitor the sound through headphones you must turn sound monitor on. To do so you must press the “MENU” button, then select the “SETTING” icon, choose “SOUND MONITOR” option and select “ON”
-
Connect headphones to check sound quality. Move the recorder to achieve optimal sound. If the levels are still too low then set the “MIC GAIN” slider to “HIGH”. Then Adjust the headphone volume by pressing the “Up and Down arrow keys”. Inversely if the sound output is too high then set the “MIC GAIN” slider to “LOW” or “AUTO”.
Background noise
Use the “LO CUT” option if there is excessive wind, traffic or similar rumbling noise. To do this press “MENU” and select “LOW-CUT”, in the low cut menu choose “ON(MIC ONLY)”
File formats
Sound
In the “SOUND QUALITY” option, there are 3 categories; “FORMAT”, “SAMPLE RATE” AND “BIT RATE”
- Format;
PCM = High quality but files sizes are large. Best for archival material
AAC = Files are smaller and easier to transfer, store and share. Similar to MP3 format
For further information, see ZOOM Q3HD
This recorder is available to staff and HDR students only.
The content on this page is intended for UNSW staff only
Need help?
If you have further questions, have a look at Self Help or the IT Service Centre website.
Alternatively, you can contact the IT Service Centre on 9385 1333.
CRICOS Provider Code: 00098G
ABN: 57 195 873 179
UNSW Sydney NSW 2052 Australia
Telephone (+61 02) 9385 1333
Authorised by IT & AV Manager, Faculty of Arts and Social Sciences, UNSW Australia
Page last updated: Thursday 19 April 2018